
TL;DR
Acoustic dampening in a closet studio isn’t just about foam. The best results come from strategic placement, sealing gaps, and ensuring proper ventilation. Distance from noise sources is always the most effective fix.
Forget fancy foam — the real secret to quiet, professional-sounding closet studios is where you put your gear and how you treat the space around it. Your first move shouldn’t be buying panels — it should be moving your rig into a room or closet where noise doesn’t bother anyone. Soundproofing is about blocking and isolating, not just absorbing echoes.
In this guide, you’ll learn how to use placement, sealing, and ventilation to make your tiny studio sound better, look cleaner, and stay cool. Whether you’re recording vocals, streaming, or just want a quieter space, these tips will help you get the most from your small setup.
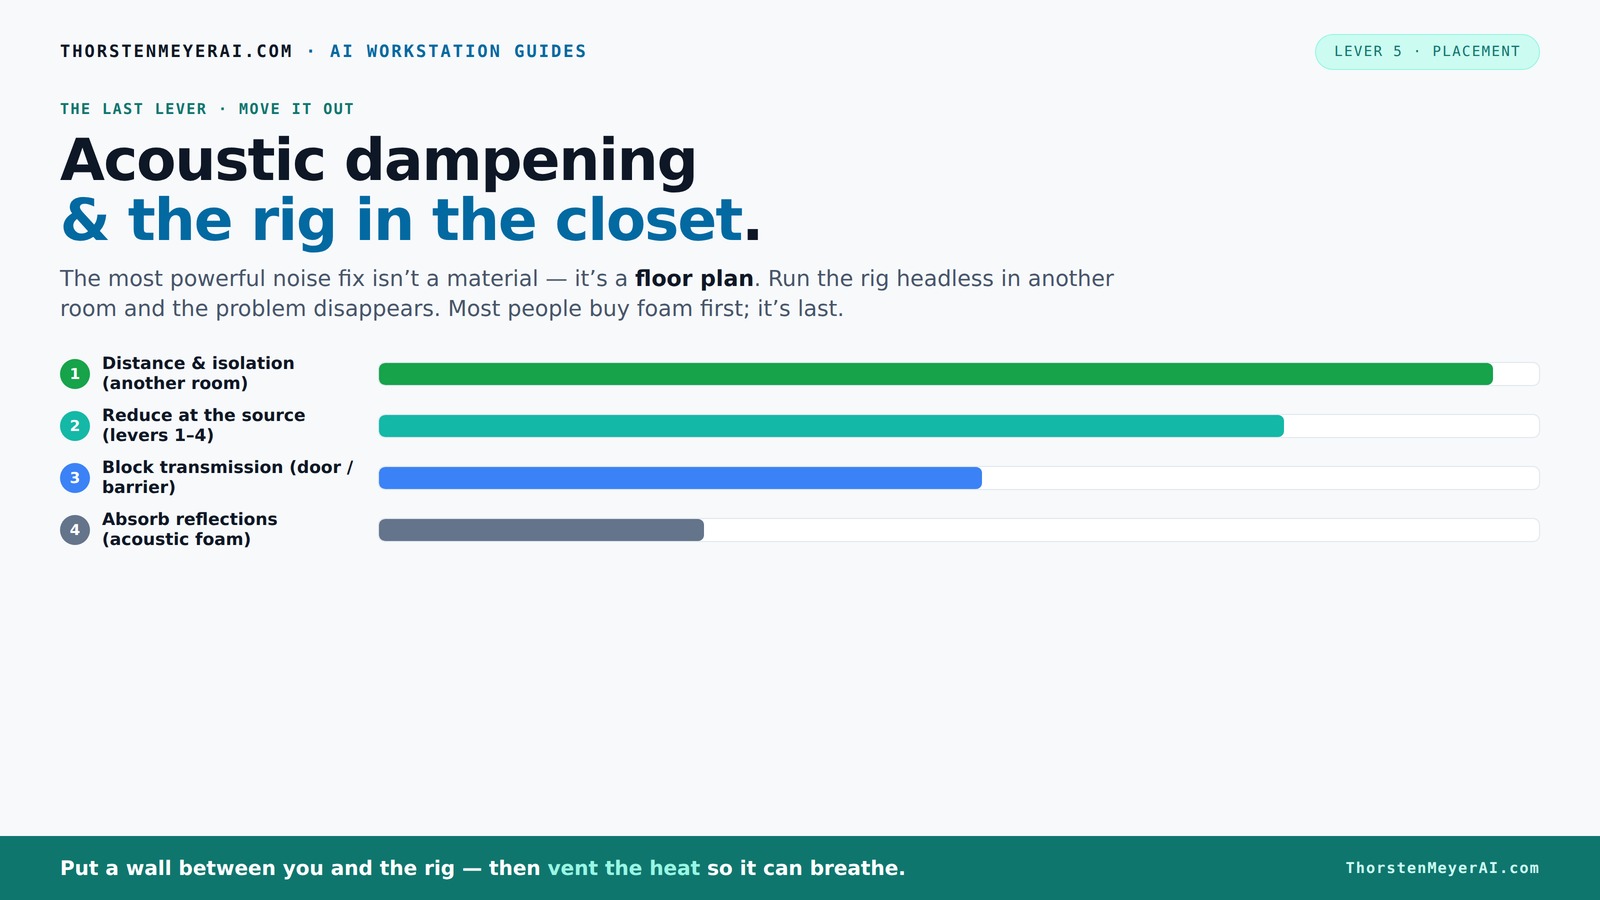
Acoustic dampening
& the rig in the closet.
The most powerful noise fix isn’t a material — it’s a floor plan. A rig you can’t hear because it’s in another room beats any amount of foam. Tap the approaches in Part 1 to see what actually works.
(another room)
(levers 1–4)
(door / barrier)
(acoustic foam)
Contain the noise, not the heat
Key Takeaways
- Moving your rig into a separate room or closet is the most effective way to reduce noise.
- Proper ventilation is essential; sealed spaces trap heat, risking overheating your components.
- Placement of acoustic treatment should target reflection points, not just corners.
- Sealing gaps around doors and outlets prevents sound leaks without expensive barriers.
- A hybrid approach using foam, blankets, and strategic positioning yields the best sound quality in small spaces.

Focusound 52 Pack Acoustic Foam Panels 1" x 12" x 12" Sound Proof Foam Panles Soundproofing Noise Cancelling Wedge Panels for Home Office Recoding Studio with 300PCS Double-Side Adhesive
Soundproofing - Acoustic foam panels triangular grooves structure for better noise absorption, helps to reduce and absorb unwanted...
As an affiliate, we earn on qualifying purchases.
As an affiliate, we earn on qualifying purchases.
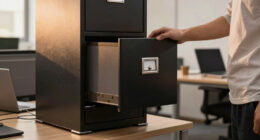
Why Your First Step Should Be Distance, Not Foam
Placing your rig far away from your main workspace makes a bigger difference than any foam panel ever could. A loud GPU or fan noise in another room is almost silent to your ears. Think of it like this: moving the noise source away is the most effective way to quiet your space.
Imagine you’re working in a tiny apartment. Instead of lining your closet with foam, you can put your PC in a closet on the other side of the house. You’ll hear almost nothing, even if the machine is running full tilt. It’s a simple, low-cost fix that works like magic.
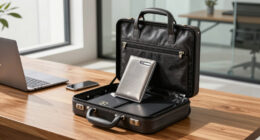
This setup works especially well in an AI workstation, where the machine doesn’t need to be next to you. All you need is a solid network connection and ventilation. Your workspace stays silent, your rig roars in a closet — problem solved.
Why does this matter? Because it highlights a fundamental principle: controlling noise at the source or by increasing distance often requires less effort and expense than trying to treat the sound after it’s already in your space. This tradeoff emphasizes that strategic placement can save you a lot of headaches and money down the line.
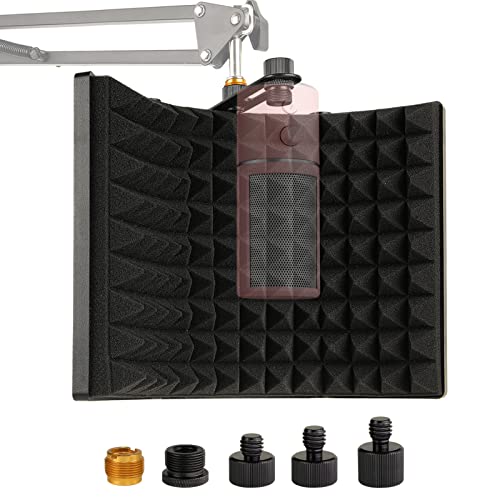
Microphone Isolation Shield, Foldable Mic Sound Absorbing Foam for Condenser Microphone Mic Arm Stand Recording Equipment Studio, High Density Absorbent Foam to Filter Vocal by Frgyee
Eliminate Interference - The inner side of the microphone isolation shield is made of high density absorbing foam...
As an affiliate, we earn on qualifying purchases.
As an affiliate, we earn on qualifying purchases.
How to Make a Closet Work Without Turning It Into a Sauna
The biggest challenge with putting a high-powered rig in a closet is heat. Trapped heat kills performance and can burn out components. The key is to make sure your closet can breathe.
Use active ventilation: install a quiet exhaust fan, or at least a vent with a small, low-noise fan pulling hot air out. Keep the space from sealing completely — a little airflow prevents heat buildup.
For serious silence, consider a purpose-built soundproof cabinet. These units combine foam lining with ducted airflow and temperature control, letting you run a 600W GPU in near silence without overheating. Check out this guide for detailed ideas on cooling and noise control.
Understanding ventilation’s role is crucial because excessive heat not only degrades performance but also risks damaging sensitive equipment. Proper airflow ensures that your rig remains cool, stable, and quiet. The tradeoff is balancing soundproofing with ventilation — over-sealing can trap heat, so designing a system that allows airflow while minimizing noise leaks is essential for long-term operation and hardware longevity.
IsoAcoustics Iso-Stand Series Speaker Isolation Stands with Height & Tilt Adjustment: Iso-130 (5.1" x 6”) Pair
5.1” (130mm) Wide x 6” (152mm) Depth. 2.8” (71mm) Height in low setting. 8.25” (210mm) height in tall...
As an affiliate, we earn on qualifying purchases.
As an affiliate, we earn on qualifying purchases.
Placement Strategies: Where to Put Your Microphone and Gear
Placement is everything — especially in a small closet. The first step is to identify your reflection points. The wall behind your mic and the side walls are prime spots for acoustic treatment. Think of your closet like a mini echo chamber — you want to tame those reflections.
Use a mirror trick: sit at your desk, have someone move a mirror along the walls. Wherever you see the mic reflected, that’s where sound bounces back and can create echoes. Put absorption panels there.
Don’t forget the ceiling — soft materials here can reduce flutter echoes. Also, position your mic close to your mouth, about 6-12 inches, to minimize room sound pickup. This tight mic placement captures your voice clearly while rejecting room noise.
Why does this matter? Because reflection points are where sound energy bounces and can cause comb filtering, muddiness, and unnatural coloration of your recordings. Proper placement and targeted absorption help you achieve clarity, which is especially critical in small, reflective spaces. This approach involves a tradeoff: over-treating can deaden the sound too much, so balance is key for natural yet controlled acoustics.

Audimute Soundproofing Acoustic Door Seal Kit - Door Sweep and Seal - (Standard Size)
Includes a Door Seal (3/16" x 1/2" x 25') and a Door Sweep (1/2" x 1.5" x 4').
As an affiliate, we earn on qualifying purchases.
As an affiliate, we earn on qualifying purchases.
Blocking Sound Leaks: Seal the Gaps, Not Just the Foam
Foam panels help with echo, but they don’t stop sound from escaping. Your biggest noise leaks are gaps around the door, outlets, and seams. Sealing these is the first line of defense against sound leakage.
Use weatherstripping around the door frame, add a heavy curtain or door seal, and insulate electrical outlets with foam or gaskets. These small steps prevent sound from sneaking out and neighbors from hearing your late-night recording sessions.
Why is sealing important? Because even small gaps can significantly undermine your efforts at soundproofing. Sound travels through any opening, so sealing is about creating a continuous barrier. The tradeoff here is cost and effort versus effectiveness: sealing gaps can be quick and inexpensive but yields substantial improvements in isolation, especially when combined with strategic placement of absorption materials.
For a more DIY approach, you can line the door with soundproof blankets or install a secondary door gasket. These tricks turn a regular closet into a semi-isolated booth, without breaking the bank. Remember, a well-sealed space enhances the overall effectiveness of your acoustic treatments and prevents noise bleed, which is crucial if you share your space or record at odd hours.
Foam, Blankets, or Both? What Works Best in a Tiny Space
Acoustic foam is great for reducing echo and reflections inside your closet, but it won’t block sound from leaving. Blankets and thick curtains absorb sound and dampen echoes even more—plus, they’re cheap and easy to hang.
For small studios, a hybrid approach works best: line the walls with foam panels for clarity, then drape blankets over the door and windows for extra absorption. Use a thick rug on the floor to reduce reflections bouncing from below.
Why combine these materials? Because foam provides controlled diffusion and clarity, while blankets add mass and broad-spectrum absorption, which are key for reducing sound leakage. Dense materials outperform thin foam for soundproofing because they add mass, which is essential for blocking sound transmission. Layering materials allows you to tailor your treatment to specific needs.ssues — for example, foam for reflection control and blankets for leakage reduction. Check out [this article](https://thorstenmeyerai.com/low-noise-pc-cases-airflow/) for more on how to layer materials effectively.
Keep in mind that the effectiveness of each material depends on how well it’s installed and sealed. Combining different approaches gives you a versatile toolkit for optimizing your tiny studio’s acoustics without breaking the bank.
Avoid That Boxy, Boomy Vocal Sound in Small Rooms
Small rooms tend to boost bass and cause a hollow, boxy sound. The fix? Add absorption at reflection points, especially overhead and on side walls. Bass traps in corners help tame low-end buildup.
Use soft materials like foam panels, hanging blankets, or even thick curtains on the walls. Position your mic away from walls and keep it close to your mouth. This setup helps your voice stay focused and natural.
Why does this matter? Because in small spaces, sound waves bounce around and reinforce certain frequencies, creating a muddy, unnatural sound. Proper absorption at reflection points prevents these issues, resulting in clearer, more natural vocals. The tradeoff involves balancing absorption and liveliness — too much deadening can make recordings sound dull, so strategic placement is key for maintaining a natural tone while controlling boomy frequencies. DIY solutions like placing a folded blanket behind your mic are effective and inexpensive ways to target specific problem areas.
Implementing these tips ensures your vocals sound warmer, clearer, and less like they’re singing from a cardboard box, making your recordings more professional and enjoyable.
How to Set Up a Budget-Friendly DIY Closet Studio
You don’t need to spend a fortune to create a decent recording space. Start with the basics: a sturdy desk, some foam panels, and heavy blankets for sealing gaps. Use what you already have—rugs, curtains, even old mattresses can help absorb sound.
Place your mic close to your mouth, and use a pop filter to keep things clear. Seal the door with weatherstripping or thick curtains. For ventilation, an inexpensive computer fan or small duct can keep the heat down.
Key tip: focus on sealing gaps and placing absorption at reflection points. These small investments make a huge difference. Want more ideas? Check out [this DIY guide](https://thorstenmeyerai.com/reduce-heat-noise-ai-workstation/).
Understanding that you don’t need high-end equipment to improve your sound quality can be liberating. Often, simple, well-placed materials and smart setup choices outperform expensive gear if used correctly. The tradeoff is balancing cost, effort, and effectiveness — you can optimize your space incrementally without breaking the bank, making professional-sounding recordings accessible to everyone.
Frequently Asked Questions
Is acoustic foam enough for a closet studio?
Acoustic foam helps reduce echo and reflections but won't block sound from escaping. To truly soundproof, combine foam with sealing gaps and adding mass to walls or doors. Foam alone is a good start but not the full solution.
Where should I place acoustic panels in a closet?
Focus on reflection points: the wall behind your mic, side walls, and ceiling. Use a mirror trick to identify where sound bounces back. Avoid just lining corners; treat the spots where sound reflects directly into your mic.
Should I treat the corners with bass traps?
Yes, especially in very small closets where low-end buildup causes muddy vocals. Bass traps in corners help tame these frequencies, but don’t neglect overhead and side wall absorption for a balanced sound.
How thick should acoustic panels be?
In small spaces, 2-inch panels are often enough. Larger rooms or more problematic low frequencies might require 4-inch panels or bass traps for better control.
How do I prevent sound from escaping the closet?
Seal gaps around the door with weatherstripping, block outlets with foam or gaskets, and use thick curtains or blankets over openings. Combining sealing and absorption makes your closet more soundproof.
Conclusion
The truth is, a closet studio can be a secret weapon—if you treat it right. Focus on where your sound is coming from and how to block or absorb it, rather than just throwing foam on the walls.
Remember: the best soundproofing is often about moving the noise away and sealing leaks. Your next step? Pick a corner, seal it up, and think about ventilation. Quiet, focused work is just a few smart moves away.